Posts

Showing posts with the label UBUNTU

Connect to Amazon EC2 instance using Filezilla and SFTP

Image
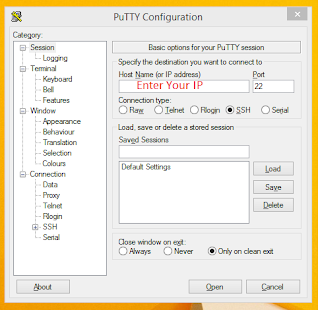
Hello friends this tutorial help you how to connect AWS EC2 instance using Filezilla and SFTP. First you need to have .pem file. This .pem file is created when you are creating a new instance in your AWS account. Follow below steps to connect AWS EC2 instance. 1. Start Filezilla. Goto preference ->connection->SFTP 2. Add .pem file then you will get prompt to convert .pem file. 3. Save with same name. 4. Add Host address. You will get public ip from AWS EC2 instance. 5. Username ec-2 or ubuntu. Username you will find in connect tab. 6. Port : 22 7. Connect. 8. Finish.

Magento – Newsletter's emails stuck in Queue

Image
If you are scratching your head to figure out why not Magento sending newsletter email. Here we got the same problem. You can check on Problem with Solution. Problem We installed newsletter pop up extension which was working fine. But after some days we saw newsletter emails are not working. We tried many solutions, Check Magento newsletter setting and also check cronjob code. But no luck. Then we have tried to uninstall recently installed extensions on the server then we found MailChimp and Newsletter POP extension are conflicting with each other. If you have a facing same problem then you can apply the following solution 1. First, check cronjob properly set or not. sudo crontab -e */5 * * * * /path/to/php -f /path/to/cron.php  2. This solution we found on ebizmarts forum. Comment out line 118 of app/code/community/Ebizmarts/MailChimp/Model/Observer.php //$subscriber->setImportMode(true); //commented out to enable Magento to send emails In app/code/communit

Free AWS EC2 Ubuntu Instance Website setup

Image
Amazon Web Service is a cloud platform which given us to create free hosting in both platform like Windows and Linux. Here we are working on Ubuntu setup. Where we will install Apache2, PHP and MySQL. 1. First you have to create new account in AWS. If you have existing account then no need to create. 2. After login you have to select EC2 option then you enter EC2 Dashboard. 3. Click Launch Instance 4. Select Free tier Eligible Ubuntu option. 5. Add New Volume EBS. 6. Add New Tag. 7. Add Security Group.   Type : SSH   Protocol: TCP   Port : 22   Source : Anywhere   Type : HTTP   Protocol : TCP   Port : 80   Source : Anywhere 8. Review and Launch 9. Create a New Pair Key. Download Key. 10. Using Puttygen.exe software create public and private key. 11. Login SSH using putty.exe Now we are ready to install Apache2, PHP, MySQL. Command 1 ( Update Ubuntu server ) sudo apt-get update sudo apt-get dist-upgrade Command 2 ( Install apache2 server ) sud

Login SSH using Putty.exe

Image
Login SSH using Putty.exe Putty is an SSH and Telnet client software, developed by Simon Tatham for the Windows platform. Putty is open source software Follow below steps which can help you to login SSH using putty. 1. Download Putty.exe 2. Enter IP. 3. Select PPK file path provide by your hosting provider or if you are using AWS then you will get ppk file from there also.

How to check UBUNTU version?

When I was learning Ubuntu it was very difficult to know Ubuntu version. Refer following step which can help you to know Ubuntu version. Step 1: Open the terminal. Step 2: Enter the lsb_release -a command. Step 1: Open “System Settings” from the desktop main menu in Unity. Step 2: Click on the “Details” icon under “System.” Step 3: See version information. Or Use this in the terminal to show the details about the installed Ubuntu "version": lsb_release -a